Passion

The art of classic cooking

Tuesday, 6 October 2015

Chilli Cheese Sandwich Recipe

Welcome back to my sandwich mania!! I have already spoken written about my love for sandwiches in my Vegetable Sandwich and Peanut Butter Chocolate Banana Sandwich posts. ( One is comfort and the other one is comfort along with decadence, if it makes any sense :) ) And now today I bring to you the very best Chilli Cheese Sandwich!

Chilli Cheese Sandwich is one of my favorite dishes at our nearby chat shop. I love cheese at the same time have an Indian tongue that craves hot and spicy flavours, Chilli cheese sandwich is one of the perfect recipes that satisfies my both cravings...
The standout thing for this Sandwich is- I have made a paste of chillis ( instead of chopping them ) before mixing with cheese as I love to enjoy my chilli - cheese flavour in every bite. I strongly suggest you not to skip this step as it makes a huge difference in the end result.


And finally the butter though used little, is what that ties it up altogether. I mean chilli, cheese and butter is a lovely combo right? So go ahead and make yourselves some wonderful Chilli Cheese Sandwiches!! Let me know how you liked them...
 

Chilli Cheese Sandwich

 Comforting cheesy sandwich with perfect chilli and cheese balance!
 Prep time:  Cook time: 
 Total time: Yield: 2 Sandwiches

Ingredients:
Bread slices: 4
Butter: 1 tbsp 
Cheese: 1/3 cup ( grated )
Green chillis: 3
Sea Salt: 1/2 tsp or to taste 
Oil: for greasing 

METHOD:
1) Butter the bread slices and keep them aside. Place the grated cheese in a bowl.
pic name pic name pic name
2) Grind the chillis along with sea salt to a smooth paste ( Here, I have used our ammi (grinding stone)) Add the chilli paste to the cheese and mix well with a fork.
pic name pic name pic name
3) Apply this chilli cheese mixture to 2 of the buttered bread slices and close with the remaining 2 slices.
pic name pic name pic name
4) Preheat your sandwich maker as per its instruction manual. Lightly grease the inside with oil and place the prepared bread. Close and toast for 1 to 2 minutes until golden brown on top and the cheese is all melted and hot.
pic name pic name pic name

There you have it - The Best Chilli Cheese Sandwich!!!


Here is a little closer look...
NOTES:
1) If you don't have an ammi, you can use a mixer but you need to make a little large batch to make it into a smooth paste ( you can store the leftovers in the refrigerator for 2 days ) If you do have an ammi, now is the right time to use it, because this sandwich is soooo good!
2) While adding salt add carefully as the cheese will also contain salt.
3) You can use any cheese you like. Here I have used mozzarella cheese.


Happy Cooking,
Sindhiya.S
Read More »

Thursday, 30 July 2015

Creme Caramel Recipe

Creme Caramel - The very classic smooth and velvety custard / pudding full of vanilla flavour with a caramel on top....

Creme Caramel Recipe

Both my daughters are a big fan of these. You could just see their eyes sparkle at the sight of these. Especially my first daughter Neha could hardly wait for them to set in the refrigerator ( Like mother, like daughter :) )

Creme Caramel Recipe

This is a very simple recipe with basic ingredients - milk, egg, sugar and vanilla. But when done correctly, you will have one outstanding velvety smooth custard with a lovely caramel on top!!!

Here are a few tips that will help you yield a perfect Creme Caramel...

  • You need a deep caramel colour, but be careful not to burn it. So, do watch carefully while making caramel.
  • We don't want the custards to puff up and rise, we just need to set the custard, so don't aerate the eggs by beating in a lot of air.
  • And finally, please! please! please!!! DO NOT OVER BAKE. Take it out of the oven when the top is set and centre still jiggles. It will continue to cook as it cools down and set perfectly to a smooth, melt-in-mouth custard!!!
 

Creme Caramel

 Velvety smooth vanilla creme custard with a luscious caramel on top!
 Prep time:  Cook time: 
 Total time: Yield: 6 ramekins

INGREDIENTS:
For the Caramel: 
Sugar: 1/2 cup 
Water: 3 tbsp 
For the Creme:
Milk: 500 ml 
Vanilla Bean: 1 
Sugar: 1/4 cup 
Eggs: 3

Recipe Source: Home Cooking Adventure
METHOD:
1) Take 1/2 cup sugar in a sauce pan. Add water to it and bring it to a boil. After the sugar melts, reduce to medium flame.
pic name pic name pic name
2) After a few minutes, the sugar will start to caramelize around the edges. You can slowly stir the pan for even colouring, but do not stir! When the colour reaches a deep golden brown, remove from the heat and pour the hot caramel on the ramekins.


[ If you need to know more in detail about making caramel, you can check my Caramel Sauce post where I have given all the details about the process and about caramel colour comparison ]
pic name pic name pic name

 3) Swirl the ramekins to cover the base completely ( Be very careful as they are very very hot ) Holding one end of the vanilla bean, split it in half with the tip of a sharp knife and scrape out the seeds.
pic name pic name pic name
4) Add the vanilla seeds and the bean to the milk and heat it gently in low flame till you can see bubbles around the edges( do not let it boil ) Take it off the heat. Close it with a lid and set it aside for 5 minutes to infuse all the vanilla flavour. Take 3 eggs and 1/4 cup sugar in a separate bowl. 
pic name pic name pic name
5) Mix the sugar and eggs with a whisk  ( No need to beat in hard, as you don't want the custard to rise ) remove the vanilla bean from the milk. Now slowly add the milk mixture to the egg mixture, stirring constantly.
pic name pic name pic name
6) Strain the mixture and then divide it equally among the prepared ramekins.
pic name pic name pic name
 7) Place 5 ramekins in a large baking pan. Add enough boiling water ( add it along the corner of the pan so that water doesn't splatter over the ramekins ) till it comes about halfway up the sides of the ramekins. Finally place the 6th ramekin carefully in the pan.
pic name pic name pic name
8) Bake in a preheated oven at 160 C for 25 to 30 minutes or until just set on top and jiggles in the middle. Transfer them to wire rack to cool completely. After it comes to room temperature, cover with a cling film and refrigerate for atleast 4 hours
pic name pic name pic name

That's it, there you have it - the amazing velvety smooth vanilla creme custard with a luscious caramel on top!!!
Creme Caramel Recipe
NOTES:

1) You can substitute the vanilla bean with 1 and 1/2 tsp vanilla extract. Just add it finally after mixing the milk and egg mixture.
2) For serving the creme caramel, run a knife around the edge of the ramekin and place a plate over it. Carefully invert it over the plate and finally lift the ramekin to feast your eyes....The custard will just slide out with caramel drizzling all over it!!!
3) Burnt caramel will yield a bitter taste so do watch carefully, while making caramel.
4) Total time does not include the cooling time.


Creme Caramel recipe


Cheers,
Sindhiya.S
Read More »

Friday, 10 July 2015

Chicken Vembattam Recipe ( Simple and Elegant Chicken Dish )

Simple, comforting Chicken dish full of flavour with tiny chicken pieces!!

Simple and easy chicken recipes
This is my MIL's native dish. And don't ask me, why is it called Vembattam? As long as it tastes wonderful you don't need the name reasoning all right? ( Good! because I don't know :) )
It doesn't require any fancy ingredient nor does it require any fancy equiment, but the taste of it will surely blow you off.
Whenever you want to eat chicken and not in a mood for a heavy dish, then this is the dish for you. Even after two helpings, you feel miraculously light!!! And I promise you, that you will definitely go for more than two helpings :)

Simple and easy chicken recipes
The tempered ginger and garlic combined with curry leaves and coconut makes it a very aromatic chicken dish. This Chicken Vembattam tastes wonderful with roti, rice and dosa too..
 

Chicken Vembattam

 Simple and elegant Chicken dish for roti and rice!
 Prep time:  Cook time: 
 Total time: Yield: 2 to 3 servings

Ingredients:
Chicken: 1/4 kg ( finely chopped )
Oil: 2 tbsp
Mustard: 1/2 tsp
Urad Dal: 3/4 tsp
Finely Chopped Ginger: 1 tbsp
Garlic: 4 cloves ( finely chopped ) 
Shallots: 5 or 6 ( finely chopped ) 
Curry leaves: 1 sprig
Turmeric Powder: 1/2 tsp
Dry Chilli: 3 big or 4 small
Salt: To taste
Water: 3/4 cup 
To Grind:
Chopped Coconut: 2 and 1/2 tbsp 
Cumin Seeds: 1/2 tsp
Curry leaves: 1 sprig


METHOD:
1) Heat oil in a pan. Add mustard seeds. Once it splutters add the urad dal. Then add the finely chopped ginger and garlic and fry for a minute ( no need for colour change ) Now add the shallots, split dry chilli, turmeric, curry leaves and fry until onions are transluscent.
pic namepic namepic name


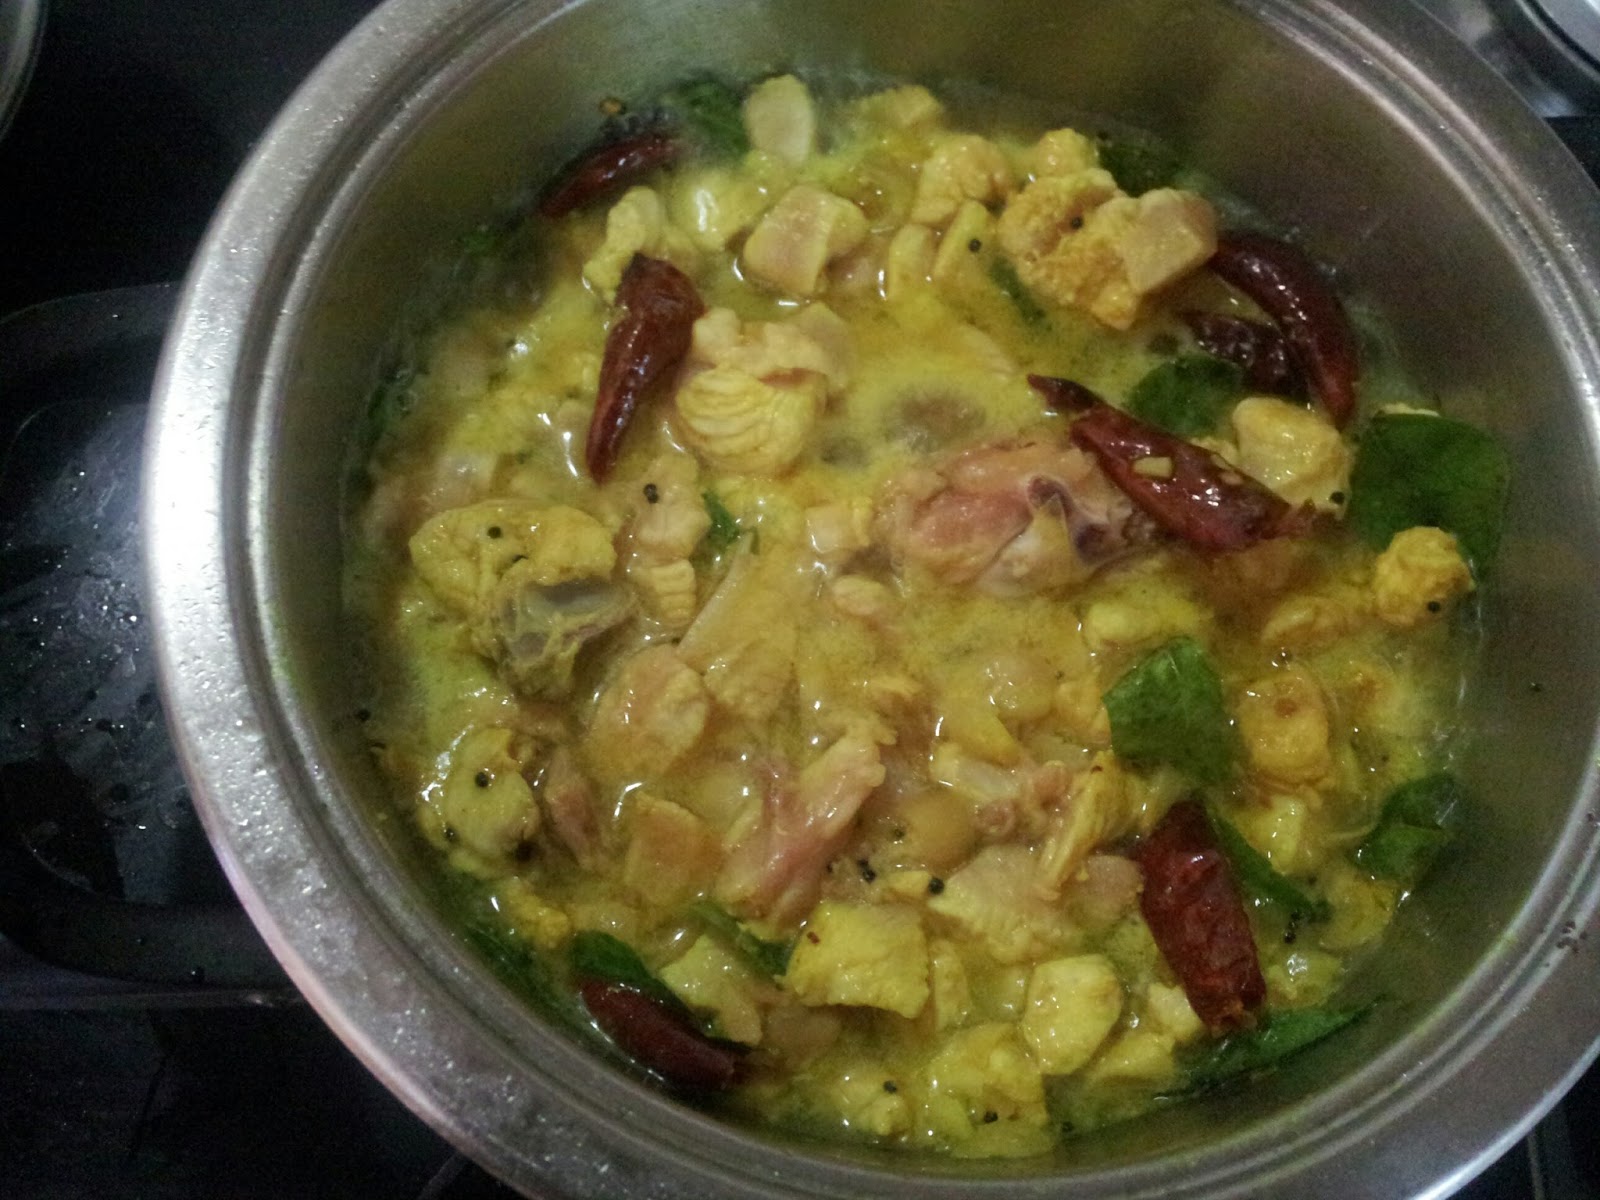
2) Add the chicken pieces and give a very good toss. Add the water and bring it to a boil.
pic namepic namepic name

3) Add salt. Close and cook for 10 to 15 minutes in low medium flame. Meanwhile take the items under the title To Grind in a mixer.
pic namepic namepic name
4) Grind the contents to a coarse mixture just like scrapped coconut. After 10 minutes, when the chicken is cooked add the coconuts mixture to it and mix well for a minute on high flame. Switch it off.
pic namepic namepic name
That's it the very easy and tasty chicken dish is ready!!!

Simple, tasty and easy chicken recipes

NOTES:
1) For this recipe use a combination of chicken pieces with and without bone as it makes it more flavourful.
2) As the pieces are very small, the chicken gets cooked quickly so make sure not to overcook.

Cheers,
Sindhiya.S
Read More »